
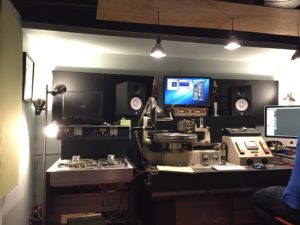
(A look at the cutting engineer’s room. Camron Henry’s the man!!!)
We’d completed our recording! All of the music was recorded at Williamson Magnetic Recording to 1” magnetic tape and then mixed down to 1/4” tape…just the way we wanted it. We had 13 songs that clocked in at over 50 minutes. That’s too long for a standard vinyl LP. The problem being, if we tried to cram all 13 songs onto one piece of vinyl, we risked degradation sound. For you nerds that want to know more, sound quality, particularly toward the center of the disk, can be compromised if you go much over 20 minutes per side (Kevin Gray explains the phenomenon well here). So, we decided to keep each side to 20 minutes and cut three of our songs from the vinyl recording we planned to release (No worries though, the three cut songs will appear on the CD to be released down the road).
At this point in the process, we were in possession of 3, 1/4” reels of tape. These reels represented our only copy of our work to date. That scared us worse than spiders and snakes. So, we had a back up copy transferred from the tapes to a digital format. These digital files would be used for the digital mastering later. It just made us feel better that we had a back-up of our work to date.
Where to take the tapes for mastering? Turns out that there are only a few good options for vinyl mastering (like, London, Brooklyn and Nashville). Nashville was the best, most viable option because, I could hand carry the tapes AND sit in on the process. So, on a sunny day in late May, I hopped the bus, tapes in hand, bound for Welcome to 1979 in Nashville.

(A view from the control room at Welcome to 1979 – a full service recording studio)
Welcome to 1979 is a groovy recording facility that specializes in analog production. They’ve got a full service studio (should you wish to, you could record, mix, master and electroplate your stampers all in one place). Upon arriving, Chris Mara (the studio owner with Wisconsin roots) gave us the grand tour of the facility. They’ve got everything you’d need to complete a quality recording there (Yes, they can do digital too). I was introduced to their cutting engineer, Camron Henry, who got right to work listening to our mixes and calibrating his equipment to insure our mastered album would retain the verve and elan we were gunning for.
And so, there we sat, listening, tweaking, cutting test lacquers, listening tweaking…
When we were happy that the reference lacquers accurately represented our original tapes, we cut the master. That master went to their on-site electroplating shop where the master is place into electroplating baths until the desired metal thickness has been built up. The metal is then pulled away from the lacquer disk which leaves you with a “negative” of the original lacquer. From this negative, a stamper is created. The lacquer mastering took a day and the stampers were ready within the week.
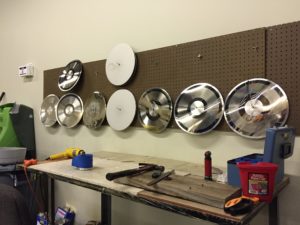
(A few electroplatings, hanging out, chillin’)
Next step…pressing records!